Liquid Air-Low Temperatures
- Circa 1987
These captions and transcript were generated by a computer and may contain errors. If there are significant errors that should be corrected, please let us know by emailing digital@sciencehistory.org.
Transcript
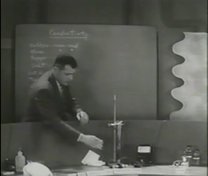
00:00:00 Hello, I am Harry Sello. It is my pleasure to introduce Tempest in a Test Tube, a television
00:00:10 show which made its debut August 24, 1955 on KQED Channel 9, the educational station
00:00:18 for the San Francisco Bay Area. Tempest was a series of 53 half-hour shows pioneering
00:00:26 a new approach in which I, as lecture demonstrator, gave live, unrehearsed presentations of a
00:00:33 series of chemical experiments. These were designed to illustrate basic, simple chemical
00:00:40 principles. The purpose was to stimulate an interest in chemistry by teenage students
00:00:46 and by adults. The talks and experiments had to be entertaining, educational, and simple.
00:00:56 Creativity and liveliness were key to the approach. All the experiments used in the
00:01:01 shows were designed and constructed by members of the California section of the American
00:01:06 Chemical Society. The participants were employed by the Shell Development Company, Emeryville,
00:01:12 and by Chevron Research, Richmond. A grant of $52,000 from the Ford Foundation and National
00:01:20 Educational Television permitted the filming of the first 24 shows of the series. The management
00:01:27 for the ACS consisted of Alan Nixon, section chair, Fred Strauss, TV committee chair, myself
00:01:35 as first MC, and Aubrey McClellan, second MC. We four constitute the core of the present
00:01:44 committee. The series was extremely popular then with KQED viewers of all ages. The senior
00:01:54 chemist committee of the California section today is determined to revive Tempest for
00:02:01 the benefit of elementary schools, high schools, adult education classes, ACS local sections,
00:02:09 historical archives, TV stations, and similar organizations. We believe in chemistry as
00:02:16 a second language. While basic principles have not changed, practices have. Forty-five
00:02:25 years ago, such simple chemical demonstrations were not treated with the degree of safety
00:02:31 considerations that they are today. Today, even such simple demonstrations would be carried
00:02:37 out with the proper regard for safety glasses, shields, protective gloves, laboratory coats,
00:02:46 and visible fire extinguishers. The principle of safety first would be explicitly present
00:02:52 as part and parcel of a modern Tempest in a Test Tube.
00:03:22 Tempest in a Test Tube, a series of experiments designed to explain the mysteries of
00:03:52 chemistry and the laws that govern it. Produced by KQED San Francisco, in cooperation with
00:04:07 the California section of the American Chemical Society, for the Educational Television and
00:04:17 Radio Center. And now let's go to our laboratory and meet Dr. Harry Sello.
00:04:24 Hello. I'd like to show you a very unusual material. It pours like water.
00:04:51 But it doesn't dampen the table. It's boiling, as you can see by the sputtering of the material,
00:05:03 yet it's way, way below icy cold. And it seems to be very active, although there's nothing here
00:05:12 that's disturbing it. This unusual material is liquid air, the topic of this talk. Let's look at
00:05:23 some of the properties of liquid air. Pour a little bit of ordinary water on this block and
00:05:37 put the empty beaker right down in the puddle of water. Now, take some of this unusual material,
00:05:49 pour it right into the beaker. Now this is very nice material for a chemist to handle because if you miss
00:05:54 the beaker and you spill some on the table, it just disappears. No trace is left of it. So you can afford
00:06:00 to be a little sloppy without having anyone notice it. The boiling action is due to the extremely low
00:06:08 temperature of the liquid air. There's a frost forming on the outside of the beaker now. Boiling seems to be
00:06:19 quieting down a bit. The beaker is frozen right to the block. The liquid air is so cold that it froze the puddle
00:06:35 of water, or most of it, to ice, and the ice caused a bond between the beaker and the block. The fog that you see
00:06:45 streaming out is not liquid air, but is due to the liquid air. The cold air coming away from the liquid, evaporating
00:06:53 from the liquid, chills the moisture in the warmer air surrounding the beaker, causing this fog to occur. There is the
00:07:02 ice that formed on the block as the liquid air froze it. Let's look at a further property of liquid air. Might as well use
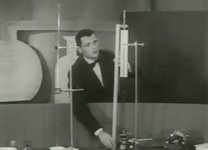
00:07:22 that which I have in the beaker here. This is a flask with a little balloon attached to the sidearm. I think we'll need just a
00:07:30 little bit more than that. I'll pour the liquid air into the flask. Again, the boiling action because this flask is warm. Stopper it up
00:07:46 and there. See what happens. Liquid air expands readily. While this is still boiling, let's bring up our little pinwheel. You can see
00:08:10 that there is quite a breeze blowing from the liquid air, indicating that there's quite a rapid rate of expansion. This will slow down after a
00:08:25 while. Get the right angle where you can really make this little whirly pinwheel turn. Well, just how is liquid air made and what uses can it be
00:08:44 put to? Let's answer the first question. How is liquid air made? Over here on the blackboard is a chart of a small liquid air plant, a kind of a simplified
00:08:57 chart. This is a plant for making liquid air. Diagram. Let's name the various parts. In the center of this is a compressor.
00:09:27 In this compressor, air from the atmosphere around us is compressed to very high pressures, something like 3,000 pounds per square inch or so. As it's compressed, it's pushed over
00:09:46 through this white coil into a cooler. This cooler is cooled, that is the coil in this cooler is cooled by water being circulated in here and coming out here, just cooling water.
00:10:16 H2O in, H2O out. As this compressed liquid air, excuse me, not quite yet, as this compressed air under high pressure is cooled, because you see when it is compressed, it gets warm. If you've ever pushed up and down on a bicycle pump for any length of time, you know that the air inside of it gets hot. The same thing happens here. The compressed air gets warm, so it's first cooled by this water, then proceeds over into the next chamber, which is
00:10:46 the liquefier. By the way, I ought to put two valves in here, one here and one here, just to complete the equipment. These valves are so arranged that when the piston goes down, the air goes out to the left. When the piston comes up, the air can only come in from the right.
00:11:17 Now with my pointer, let's look at the operation of these various parts that have been named. I said then that the 3,000 pound air, that is the air under 3,000 pounds pressure and cooled here, comes around into this coil, right down to a point here. Now this is the trick in the liquid air plant or in this liquefier unit.
00:11:40 Right at this point, there is a little constriction, usually a needle valve or some sort of a tiny opening, which forces the air which has been compressed to expand out into this chamber. Now this is the trick, as I say, in making the liquid air.
00:12:00 Part of this air that expands out through this throttle, let's call it, escapes up this other coil and runs over the coil containing the 3,000 pound pressure air. Now it is a property of this kind of gas, like nitrogen and oxygen, that when it expands in such a manner, it has a cooling action, and this is what enables the liquid air to be made.
00:12:25 This cooling action is exerted on this coil here. The air that has escaped, done this cooling, then goes right back into the pipe, meets some more air from the outside, and goes back into the compressor and through the whole cycle.
00:12:42 At the same time, the air that didn't escape has been chilled by this expanding air and forms this liquid so that liquid air then comes out here.
00:13:02 The important principle then to remember is that the liquid air sort of cools itself, kind of pushes itself down by its bootstraps, if you wish. Part of it escapes, and in escaping, a controlled amount, that is, escapes, and in escaping, cools off the other material, enabling the liquid to form.
00:13:21 It is then possible to make liquid air at these very low temperatures. Having made the liquid air, we'll look at the properties of liquid air by examining how the liquid air affects various materials that are here.
00:13:40 Here's some usual laboratory equipment that's found in the laboratory around lunchtime. Pretty good. Grapes. Shame to waste these for the benefit of science, but anything will go for science.
00:13:57 Let me put the grapes in this beaker. Keep out the little stems. I think that's about enough. We don't want to use them all up.
00:14:20 Now I need my liquid air.
00:14:30 Just to show that I have grapes in the beaker.
00:14:49 There we go.
00:15:19 More like marbles. More like marbles than grapes.
00:15:44 Some of them have already broken.
00:15:50 They look very similar to cranberries. I guess this might be one way of converting grapes into cranberries.
00:15:55 Here is a piece of cloth, ordinary unbleached muslin. Nice and soft, easy to bend. Garden variety cloth. Put that in a dish and pour some liquid air over it.
00:16:18 Stir well before using. Do well on both sides. I think it's about done.
00:16:39 Kind of brittle.
00:16:46 Here we have a little chrysanthemum. Nice bright yellow flower. Chilled chrysanthemum. Ah, it's beautiful.
00:17:08 Chilled chrysanthemum. Ah, experiment is taking place right down in the beaker.
00:17:18 Let's try that one again. Notice the furious boiling action as soon as the chrysanthemum is put down in the beaker.
00:17:33 Rather brittle.
00:17:45 Rubber tubing. Stretches, bends, all down the center.
00:18:01 Ah, a little fountain. The liquid air is expanding so rapidly that it's throwing some of it right off the top of the tubing.
00:18:12 Get that thoroughly chilled.
00:18:31 Brittle rubber. Here's an example of what can happen to rubber connections, say, on a car somewhere operating at the North Pole.
00:18:38 It isn't as cold as the liquid air is up there, but the effect on rubber would be just about the same.
00:18:43 The reason why research is needed to make rubber which can withstand this type of cold.
00:18:48 Finally, here's a nice little rubber ball. Sort of some bounce to it. Not too noisy, is it?
00:19:05 Stir well.
00:19:13 Let's take this out and just see how it is right now. Not much bounce left.
00:19:27 Pound right through the table, just to illustrate that the ball is still pretty hard. No bounce.
00:19:32 The rubber has been chilled so much that it's quite brittle and has none of its elasticity left.
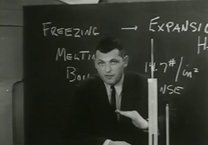
00:19:39 Just what do we mean by the low temperature of liquid air?
00:19:43 Let's take a look at this chart and compare some temperatures.
00:19:49 Here are three scales, each drawn in the form of a thermometer.
00:19:55 Three kinds of temperature scales.
00:19:59 One labeled Fahrenheit, the other Centigrade or Celsius is a name very rarely used.
00:20:04 The other, the third one, is the absolute scale or the Kelvin scale.
00:20:09 This one named after a very famous British physicist, Lord Kelvin.
00:20:16 The Fahrenheit scale is the one most commonly used in this country by weathermen, everyday people who read thermometers in the daily course of their life.
00:20:25 The Centigrade and the absolute scales are used by chemists and physicists and other scientists mostly.
00:20:33 Very rarely appears in everyday print.
00:20:37 The Fahrenheit scale was invented by a man by the name of Fahrenheit, way back in the early 1700s.
00:20:48 In thinking of how to make a scale that would show a various range of temperatures, he thought of what he might use as the lowest possible temperature on Earth, the coldest temperature.
00:20:59 At that time, science had not advanced to a very, very great degree as it has today,
00:21:05 so that the coldest temperature to him was the temperature that you could get in the laboratory by mixing ice and salt.
00:21:12 This he decided to call zero on the Fahrenheit scale.
00:21:17 If he called that zero, then the other temperatures fell into line in the following way.
00:21:22 Thirty-two was the point at which water froze on his scale.
00:21:27 He chose to call the boiling point of water 212, and here for comparison is a temperature, say, in the desert.
00:21:34 This might be what you call the hottest temperature on Earth, 130.
00:21:38 Down here at minus 45, that is 45 degrees below zero on the Fahrenheit scale, is the temperature of the North Pole.
00:21:46 So you see between this mark and this mark we have the range of temperatures on Earth, considerably below what Fahrenheit knew at that time.
00:21:55 Well, this wasn't a very good scale in the sense of how easy it is to handle, because look, between zero, between 32 and 212, that is the boiling point of water and the freezing point of water, there are 180 degrees.
00:22:08 Now, this isn't as easy a number to handle, for example, as would 100 be.
00:22:13 Well, let's look over at the next scale.
00:22:16 This is called centigrade.
00:22:18 Grade means degree.
00:22:20 Centi means 100.
00:22:22 So this is graduated in hundreds of a degree, or in hundreds of degrees.
00:22:29 On this centigrade scale, it was very simple to call the freezing point of water zero, instead of 32 as it was on the Fahrenheit scale, and the boiling point of water was called 100.
00:22:41 It was very obvious and simple so that everything between the freezing point and the boiling point of water was divided into 100 parts.
00:22:48 Here, the hottest temperature on Earth in the desert would be 54 degrees centigrade.
00:22:53 The North Pole would be 43 degrees below zero.
00:22:58 You see the temperature of the North Pole is about the same on both scales.
00:23:01 This is because the two scales kind of come together at that point.
00:23:07 Now, here is the temperature of liquid air.
00:23:09 I've been talking about 195 degrees below zero on the centigrade scale.
00:23:15 Actually, some people quote this temperature as being about 196 degrees.
00:23:23 It's in between the two. Choose whichever number you like.
00:23:26 Nitrogen boils at 195 degrees below zero.
00:23:30 Oxygen boils at 183 degrees below zero.
00:23:33 This means that if you have the two together and they're both warming up, that is temperatures going up this way, you will reach first the nitrogen temperature.
00:23:42 That means it would tend to boil away out of a mixture of the two.
00:23:45 You would then reach the oxygen temperature, the warmer one, the 183 below zero, and then oxygen would boil away.
00:23:53 But look, we have this synthetic, that is this rubber here.
00:23:58 We have that at just about room temperature along with the flour and the grapes right around in here, about 25 degrees centigrade.
00:24:06 And some 220 degrees below that is the boiling point or the temperature of liquid air.
00:24:15 Finally, the chemist is a purist indeed.
00:24:19 That is, he likes things to be just so.
00:24:21 He says, why talk about temperatures as being below zero or above zero?
00:24:25 Why don't we call the lowest possible temperature zero?
00:24:28 Then everything above that will never be below zero.
00:24:32 It will always be above.
00:24:33 Well, on this absolute scale, about which we will have more to say in a future talk, nitrogen boils at about 78 degrees absolute or kelvin, and oxygen boils at 90 degrees.
00:24:45 The temperature of zero on the absolute scale has not yet been attained, and it doesn't seem that it ever will be.
00:24:53 This, again, will be the topic of another talk.
00:24:56 Actually, we have come within a few thousandths of a degree of the absolute zero.
00:25:01 So then, liquid air is cold indeed, some 225 degrees below room temperature on the centigrade scale.
00:25:11 Just to emphasize that difference, let me get my liquid air again and pour some in this little kettle.
00:25:29 If I hold the glass beaker right near the top, the liquid air can't hurt me because the beaker only gets cold right near the bottom and it can't be handled easily there.
00:25:40 I'll pour some in this kettle.
00:25:47 I'm not worrying about spillage because the liquid air disappears even if it does spill.
00:25:53 And to chill it off, I'll put it on the ice, block of ice here.
00:26:03 There is liquid air sitting on the block of ice, and yet there's plenty of it still boiling.
00:26:11 It doesn't bother it one bit.
00:26:14 There goes the stopper.
00:26:16 You can see the reason.
00:26:17 Though I had it sitting at a temperature of zero degrees, the temperature of ice, it didn't make much difference whether it was at room temperature or at zero degrees.
00:26:26 Liquid air was so much colder that the ice didn't hurt it one bit.
00:26:31 Well, if ice doesn't bother it, let's see if a little heat will affect it.
00:26:38 Light my burner here.
00:26:46 Make sure I have enough liquid air in this.
00:26:58 There is liquid air being poured on ice.
00:27:01 No effect.
00:27:02 Same as if it were on a table.
00:27:04 The ice acts like a red-hot griddle to the liquid air.
00:27:09 Now it's really boiling.
00:27:14 And it's boiling so fast that a layer of frost is forming on the outside of the kettle.
00:27:22 If I scratch it, there was a little bit of frost to begin with, but now this layer of frost is really thick.
00:27:27 In fact, it's so thick, it's up here, it's very hard to handle.
00:27:32 My fingers are getting burned by the cold liquid air.
00:27:40 There are the scratch marks indicating the frost on the kettle.
00:27:44 I said my fingers were getting burned by the cold liquid air.
00:27:48 You see, your body cannot tell the difference between extreme hot, extreme heat, I should say, and extreme cold.
00:27:54 It always feels like a burn in either case.
00:27:57 Here's another piece of laboratory equipment, a nice tasty bit of round steak.
00:28:02 Let's see what happens to round steak when liquid air is poured on it.
00:28:10 The noise you hear is liquid air bouncing on the floor and on the table.
00:28:16 The round steak is getting a fried look.
00:28:20 Fried, maybe chilled would be a better word.
00:28:25 Let me get my tongs to handle this with.
00:28:32 See if I can fish it out of here.
00:28:35 There's some unfrozen in the center, here's some around the outside, frozen.
00:28:44 Look at the reverse side, frozen around the edges. I didn't leave it in there long enough to freeze the center.
00:28:49 This is what would happen to your fingers if you stuck them in liquid air.
00:28:52 They would get quick frozen. You wouldn't want to do that.
00:28:55 Quick frozen is only for foods.
00:28:59 By the way, the principle of quick freezing as applied to foods is based on the following, is the following principle.
00:29:11 A gentleman by the name of Clarence Birdseye, after whom some of the frozen foods are named,
00:29:16 was traveling in Labrador some years ago and found that the Eskimos there were able to catch fish
00:29:22 and put them right out into the minus 40 degrees air and keep these fish indefinitely.
00:29:29 He conceived the idea that maybe he could do this to foods, and so he did as well as many others,
00:29:35 and now it is possible to buy quick frozen foods, or frozen foods.
00:29:40 The principle of frozen foods is simply that if you freeze things very quickly,
00:29:44 the water does not have a chance to expand very much to ice, forming ice,
00:29:49 and does not rupture the cells of the material so that the food retains its original shape when it's thawed out.
00:29:57 Well, so much for quick freezing foods.
00:30:00 Let's summarize what we've seen here as to the properties of liquid air.
00:30:05 Liquid air is extremely cold.
00:30:07 When you pour it out on a tabletop, it behaves just like as if you poured water on a red-hot griddle.
00:30:14 Liquid air hits the table, runs around in the form of drops, furiously boiling all the time.
00:30:20 It's so cold that it's always boiling, and so doing it expands at a tremendous rate,
00:30:26 bursts the balloon, made a little pinwheel go around,
00:30:30 and in its coldness could freeze a variety of materials to a degree that you don't normally see.
00:30:37 Some soft grapes became like marbles.
00:30:40 A piece of rubber was no longer stretchable.
00:30:43 It was very hard, could be broken with a hammer,
00:30:47 and a piece of cloth acted like a piece of glass when it was frozen.
00:30:52 We showed a liquid air plant in which air is compressed, cooled, and liquefied.
00:30:59 The whole trick being this particular kind or peculiar kind of throttled expansion.
00:31:05 This is not an ordinary kind of gaseous expansion, I might add.
00:31:09 This is an expansion which takes place through a nozzle.
00:31:12 It's called the Jowell-Thompson effect, and it's described in some of the more advanced textbooks.
00:31:17 This expansion causes liquid air to form because it can cool itself in being liquefied.
00:31:23 Finally, we showed that even a cake of ice was not enough to cool liquid air.
00:31:28 The liquid air was still some 200 degrees or so below the temperature of the ice itself.
00:31:34 We then looked at quick frozen foods.
00:31:37 Thank you.
00:31:58 ♪♪
00:32:25 This is National Educational Television.
“Liquid Air-Low Temperatures” is one of fifty-three short educational films originally produced in 1955 for KQED San Francisco as part of the series Tempest in a Test Tube. This series of half-hour episodes illustrates basic chemistry concepts for high school students through live experiments and demonstrations by presenter Dr. Harry Sello. The experiments used in the show were designed by the American Chemical Society’s California chapter and reflect the safety standards of the time. This episode, “Liquid Air-Low Temperatures,” teaches viewers how air can be liquefied, and shows how extremely low temperatures can freeze materials, change their properties, and cause rapid expansion.
| Property | Value |
|---|---|
| Creator of work | |
| Place of creation | |
| Format | |
| Genre | |
| Medium | |
| Extent |
|
| Language | |
| Subject | |
| Rights | In Copyright - Rights-holder(s) Unlocatable or Unidentifiable |
| Credit line |
|
Institutional location
| Department | |
|---|---|
| Collection |
Related Items
Cite as
American Chemical Society, and KQED-TV (Television station : San Francisco, Calif.). “Liquid Air-Low Temperatures.” Vhs, circa 1987. Tempest in a Test Tube Videocassette Collection. Science History Institute. Philadelphia. https://digital.sciencehistory.org/works/ufo5c99.
This citation is automatically generated and may contain errors.